Mini Pinatas - We R Memory Keepers Party Week
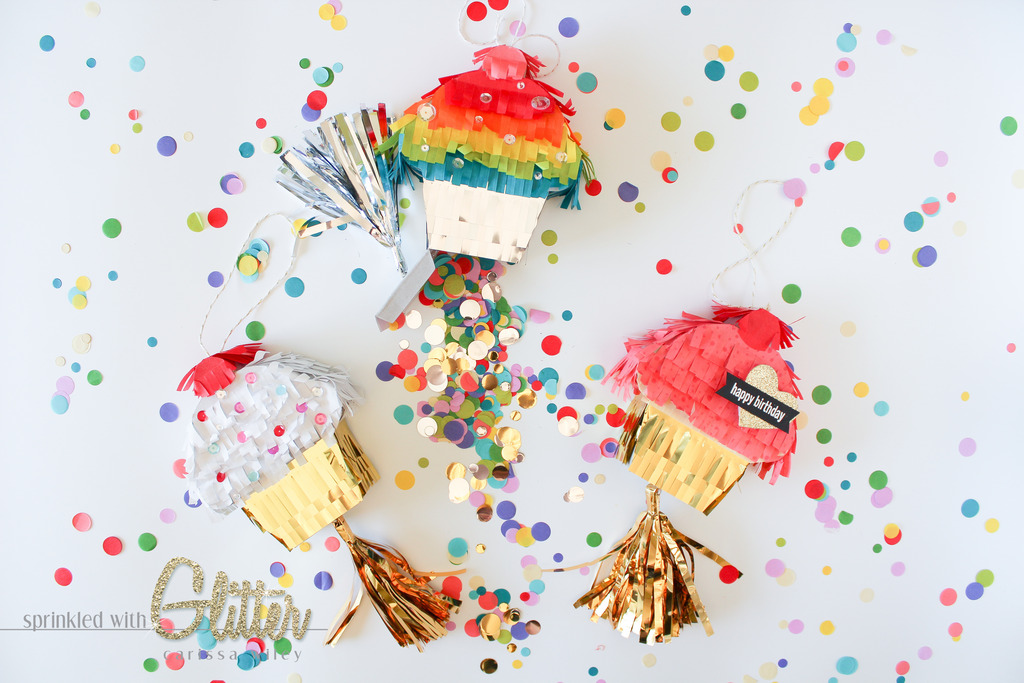
Hi everyone! I’m so excited to be sharing a fun project for Party Week on the We R Memory Keepers Blog. If there’s one thing I love to do, it’s party! I’ve created a few different versions of the WRMK mini cupcake piñatas to share with you. I’m going to give you some tips on decorating them and share a few ideas I have for stuffing them full of fun! Be sure to head to the We R Memory Keepers blog for more fun party ideas!
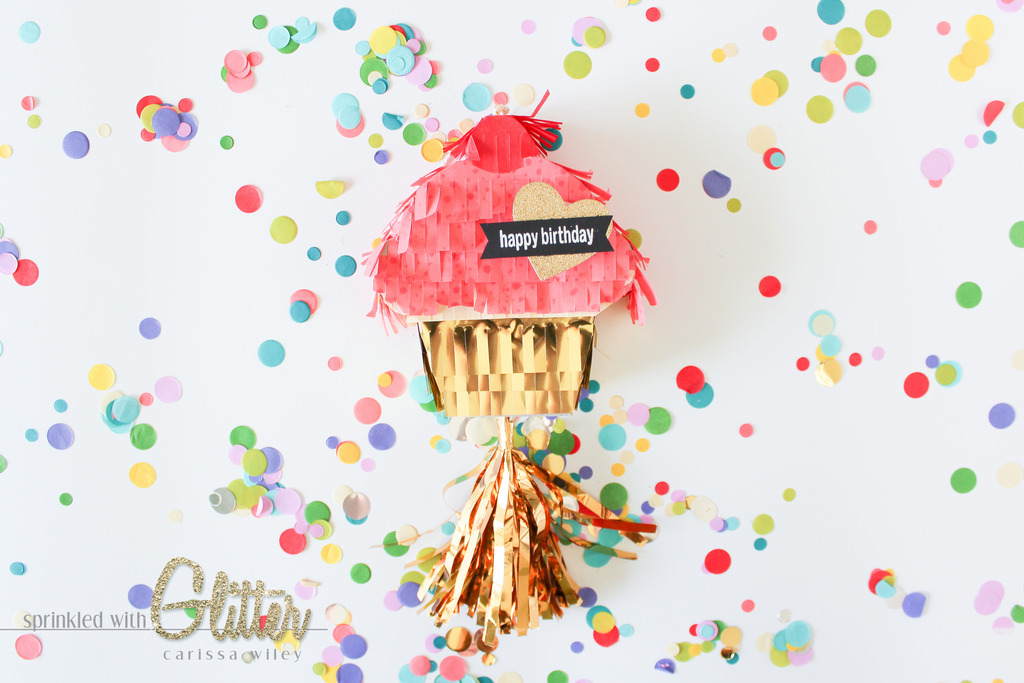
The WRMK fringe tape is a fast and easy way to decorate these mini piñatas. It’s not the only way, but I love the texture and color the fringe tape adds. Because the fringe tape has adhesive on the back, you can quickly apply it your piñatas. I love that this fringe tape is thin enough to tear too. This would be a fun project for your littles. It’s easy enough for their little hands and would allow them some creative time. It would be a great activity at your next party!
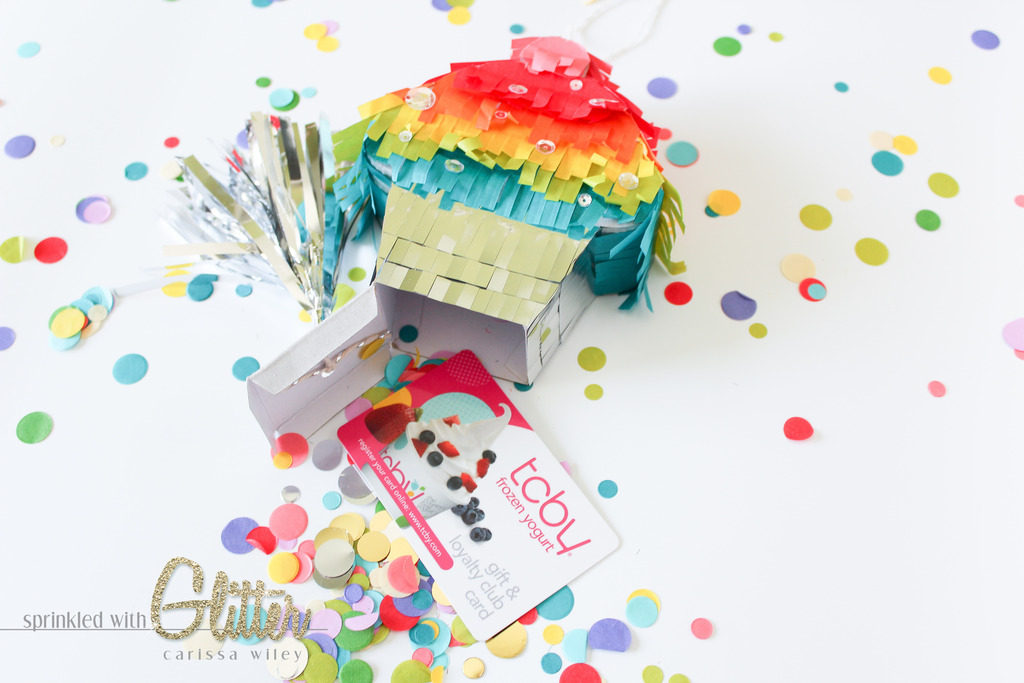
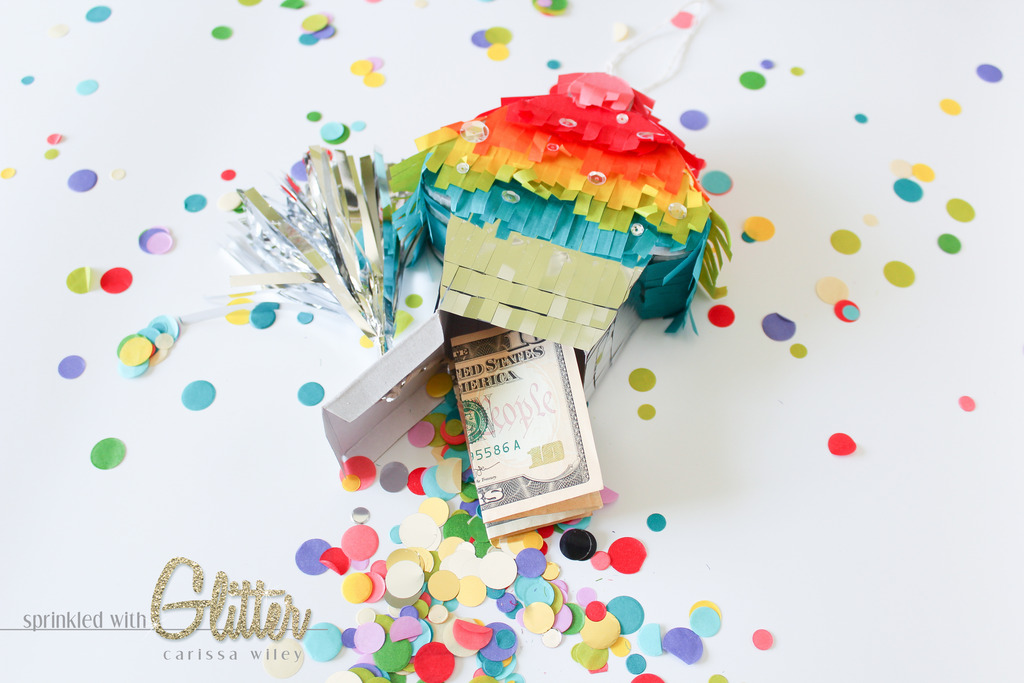
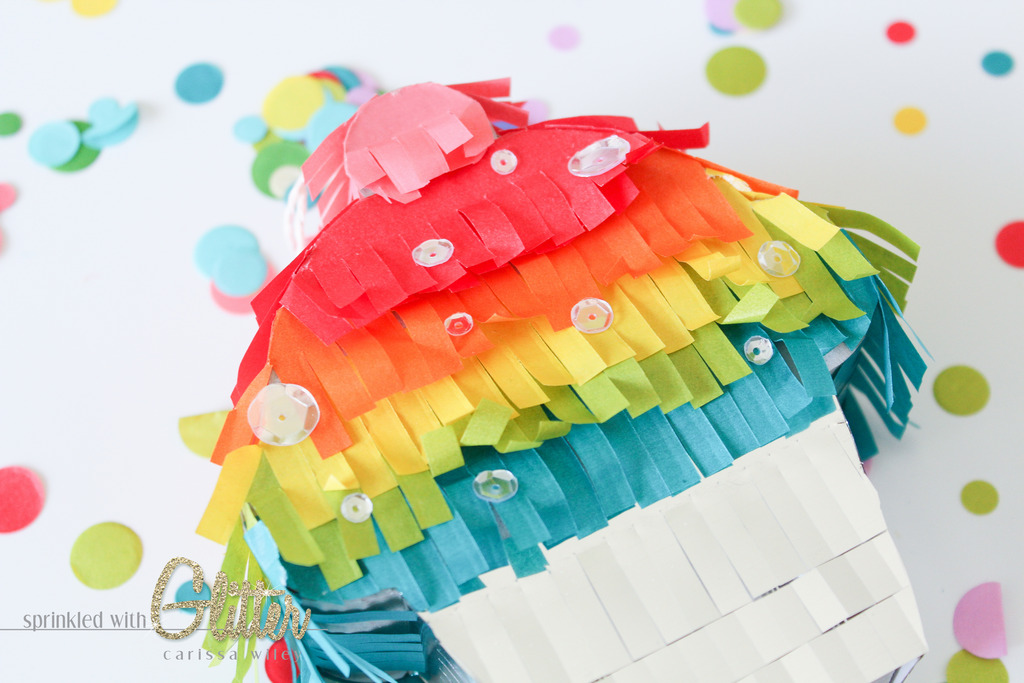
The fringe tape is available in so many fun colors. For my first piñata, I just couldn’t resist using the entire rainbow of colors. I created some rainbow frosting on my cupcake. I also used the silver metallic fringe tape along the bottom. This reminded me of the aluminum cupcake liners my mom used to use. And it adds some fun shine to the cupcake! To add even more shine, I added a silver pull to the bottom. This allows the recipient to quickly open the piñata (without getting out their mini baseball bat). I sprinkled on some sparkling clear sequins as well. These make for a fun accent. And a cupcake isn’t a cupcake without some sprinkles.
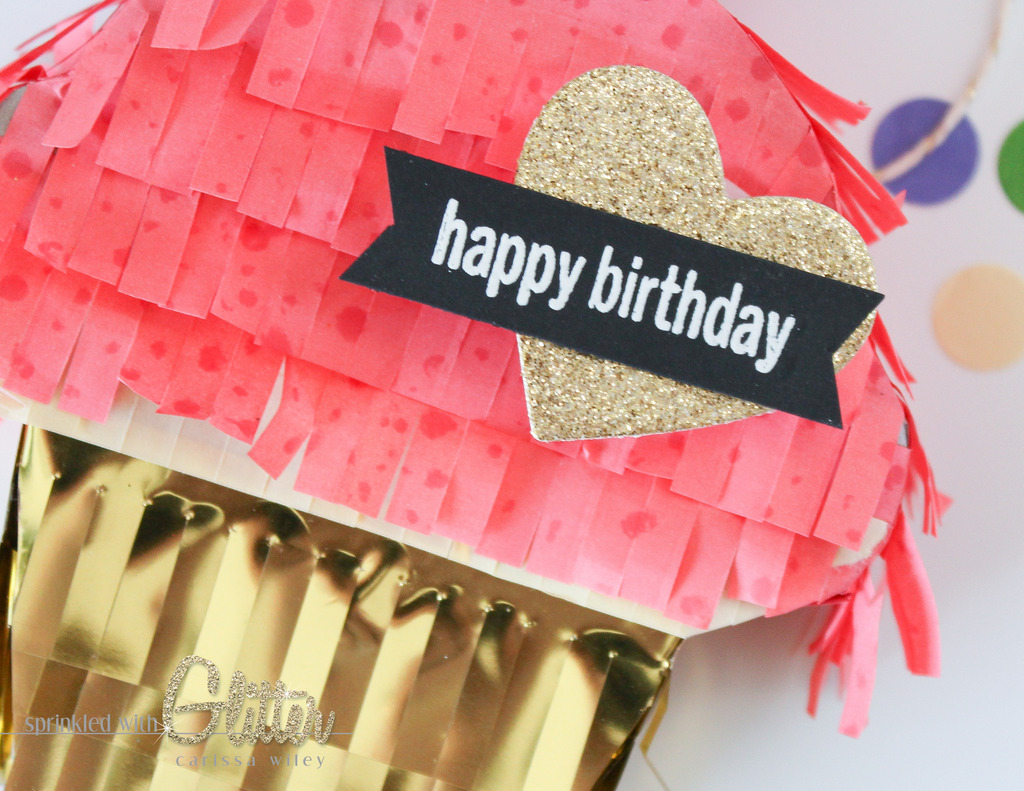
I was having such a fun time with the fringe tape, my imagination started running off on me. For my next cupcake, I was thinking of ways I could customize the fringe tape. I used a large rubber background stamp to stamp a pattern on the pink fringe. I chose a tone on tone effect for this cupcake. I think the pink polka dots are so much fun! I finished this cupcake off by adding a die cut heart and heat embossed sentiment. This would make a great little gift!
The fringe tape is also available in white. You could create custom colors of fringe using inks, markers and mists. I experimented with several of these mediums and had great success. When using a mist, it’s important that you mist lightly. You will have a bit of curling, but I think it adds to the fun texture of the fringe.
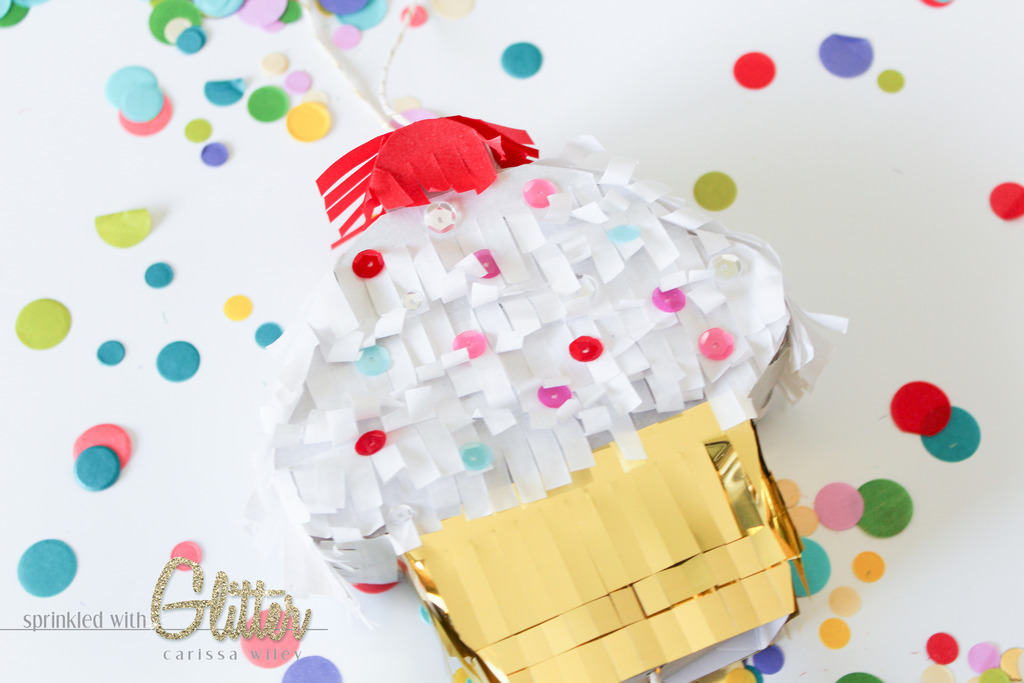
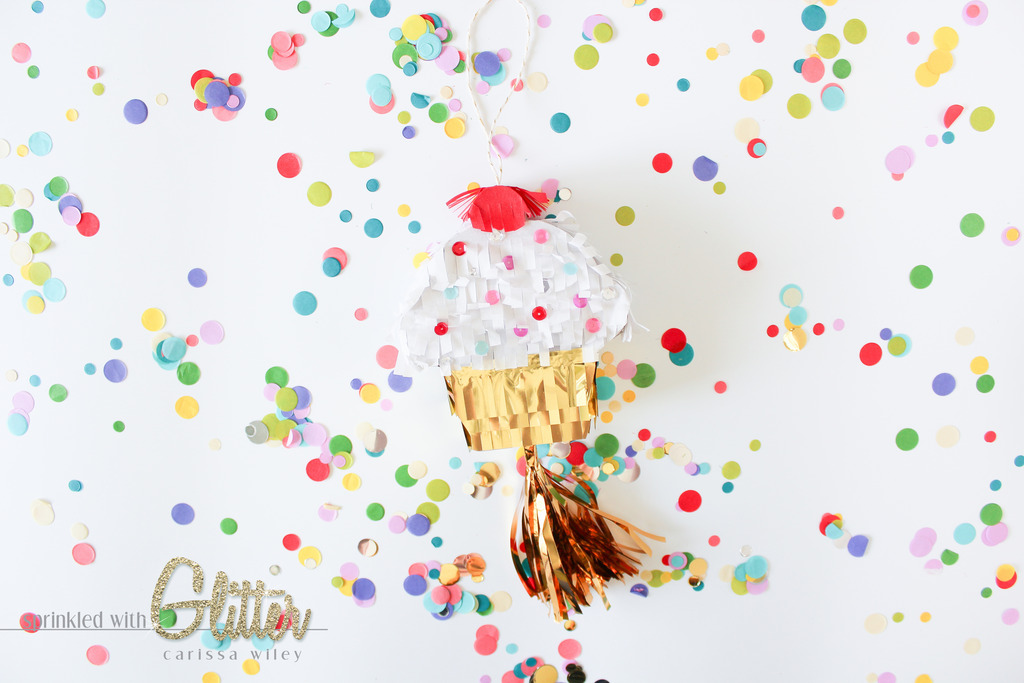
For my last cupcake, I decided to go with white frosting. Vanilla is my favorite. I used some fun colorful sequins to add a bit of sparkle and color to this cupcake. I also used some shimmer mist over the white fringe to make it sparkle. It’s hard to capture in the photos, but it really shines in real life.
I’m sharing a video tutorial featuring these fun projects. Be sure to check it out below. I’ll be sharing some tips for adding the fringe to these adorable mini piñatas.
Here’s a few tips:
- I found it easiest to apply the fringe to the front and back of the piñata first. Instead of trying to rip or cut the fringe in the shape of the piñata, which can be a little awkward, wrap the fringe around the side and tear it.
- After you’ve applied the fringe to the front and back, add the fringe to the sides of the piñata. This will cover those bits of fringe you’ve wrapped around the edge and give your piñata a finished look.
- Always, and I do mean always, work from the bottom up. It’s nearly impossible to tuck the fringe up under other layers of fringe that you’ve already applied.
- Precut fringe to add to the sides of your piñata. I found that the sides were about 1 ½ inches. I precut several pieces to apply to the sides, making the application go much more quickly.
You could also decorate these piñatas in other ways. You could paint them. You could decopage them with decorative papers. You could ink them. The sky is the limit! Since their made of a thin chipboard material, they’re very easy to work with!
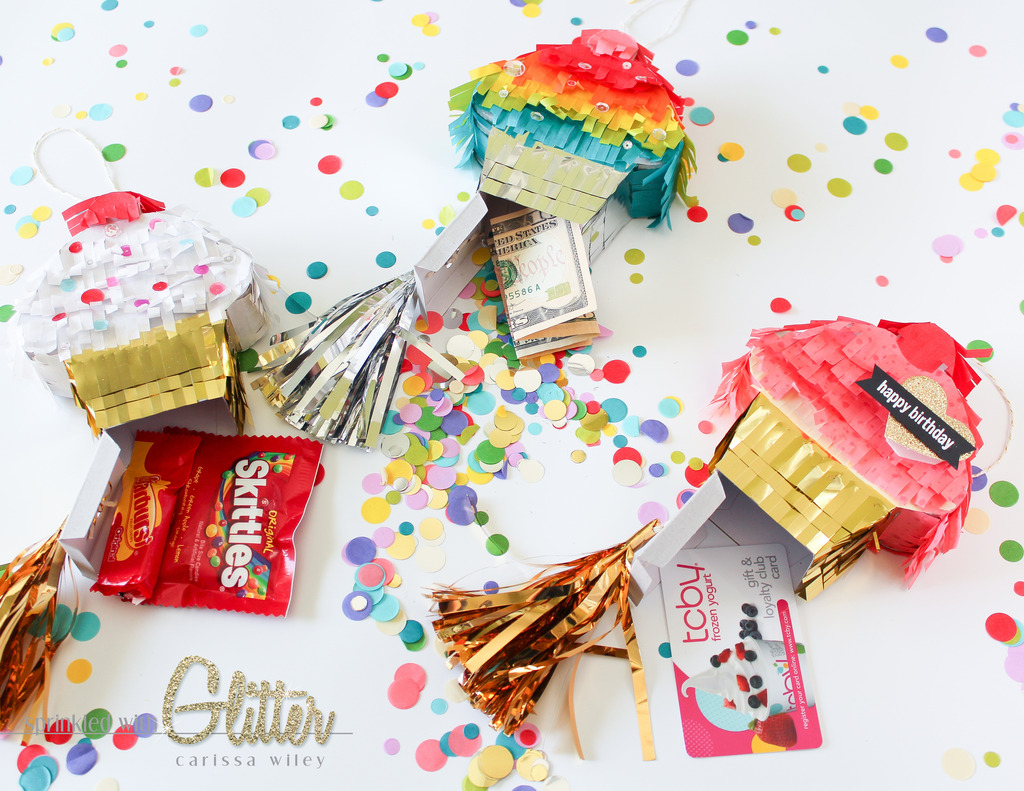
I couldn’t resist thinking of all of the fun things you could stuff inside of these piñatas. While they make fun decorations and favors for a party, they’re also a creative way to give fun little gifts. I’m sure there are a million and one things you can stuff inside, but here’s my top 10.
- Money –I mean, who doesn’t love cold hard cash?
- Gift cards – They fit perfectly inside.
- Confetti – There’s some fun colorful and metallic confetti available for these. What a fun surprise when the recipient opens it! You could also punch some fun little shapes to mix in with your confetti, like hearts or stars.
- Sequins – It’s like the sparkliest confetti you’ll ever see. And you know I love my sparkle!
- Candy – This one was maybe a bit obvious. Pinata = Candy
- Jewelry – This is a fun and creative way to give a tiny gift like jewelry. It’s a perfect fit!
- Mini nail polish – I know you’ve seen them! Those adorable tiny nail polishes would be a great little piñata stuffer for your next preteens party favors.
- Page flags, mini erasers, stickers, decorative paper clips and baby pens – For the planner lover in your life.
- A heartfelt note – This would make the cutest envelope ever!
- Glitter – Only for the person that you want angry at you forever! ;)
No matter what you fill these with, these mini piñatas are sure to be a hit!
Thanks for stopping by today! I hope you’ve enjoyed seeing different ways to decorate and use your mini piñatas! And I hope you’ll give it a try for your next party! Have a fabulous day!