Happy Cloud Card --- Creating Overhanging Elements
When I saw the adorable clouds in the Penny Arcade card kit, I had a card in mind instantly. I wanted to create a card based on a sketch I've used multiple times, which features a 3 x 4 inch card in the center of my A2 card. However, this time, I wanted to create an overhanging stamped image. I just adore the result. This happy little cloud makes me smile.
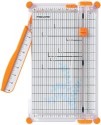
I started by cutting my white card stock a little larger than I needed. The original cut was 4x4 inches. This allowed me to do all of my stamping first, and then trim off the unwanted portion later. I used a paper trimmer to get a nice straight cut at the three inch mark, and just didn't cut the portion where the cloud was stamped. I used scissors to trim around my cloud.
I also added some stamped clouds peaking out from behind the main stamped piece. This adds a little more depth to the card and creates balance and interest.
I've included a video below walking you through the entire creation of this card. I've also linked all of the supplies below. Just click the picture to link to the product.
I used a pigment ink to stamp my clouds. And while I love the result, in hindsight, it may have been better for me to use a dye ink. A dye ink would soak into the paper and allow me to erase my pencil line without issue. However, the pigment ink erased away with the pencil line. But the fix was rather easy! You'll see me address this in the video.
I think this card would make an adorable baby card as well! Simply change the sentiment to "twinkle twinkle little star" and you'll have a perfect way to welcome a new little bundle of joy.
Thanks for stopping by today! I hope your summer is fabulous and that you're managing to stay cool! See you next week!
P.S. If you have any requests, let me know!
Supplies
*affiliate links used*


